Create a Microfrontend
In this section we are gonna create one simple Microfrontend using angular and integrate it into the Portal.
This is juts a simple example, you can use any other framework or technology to create your Microfrontend. If you already have one created you can skip the First part of this guide and jump to the Step 3.
Portal
The Portal is a web application built with Angular and TypeScript. It enables seamless integration of your micro frontends and provides an interface to interact with them.
Micro frontends are self-sufficient applications running inside of another application, also called the “microservices for the frontend”. They allow for independent releases, modularization, and the reuse of shared functionality and infrastructure.
The OpenMFP Portal leverages the Luigi Framework to integrate all your micro frontends into a single, unified entry point.
Prerequisites
- Node.js active LTS or maintenance LTS version.
- Locally running Portal, if you don't have one follow Installation guide
- npm (included with Node.js)
- Angular CLI installed globally. If you don't have it installed, you can do so by running:
npm install -g @angular/cliyou can check if everything is installed by running:
ng versionthis should show you the version of the Angular CLI, Node and the Package Manager npm.
Step 1: Create a new Angular Project
Run the following command to generate a new Angular project:
ng new my-microfrontendMove into your project directory:
cd my-microfrontendStep 2: Run the Angular App
Start the development server:
ng serveThen open your browser and go to: http://localhost:4200/
Step 3: Create a Content Configuration File
Create a new file called content-configuration.json in the public folder of your Angular project or any path that will serve this file. This file will contain the configuration for your Microfrontend.
The following is an example of very minimal content configuration file. The contents of this file are described in great detail at Configuration Documentation.
{
  "name": "my-microfrontend",
  "luigiConfigFragment": {
    "data": {
      "nodes": [
        {
          "pathSegment": "ur-path-segment",
          "label": "My Microfrontend",
          "hideFromNav": false,
          "url": "http://localhost:4200/index.html",
          "urlSuffix": "/index.html",
          "entityType": "example",
          "loadingIndicator": {
            "enabled": false
          }
        }
      ]
    }
  }
}
Step 4: Serve the Content Configuration File
Restart the server and validate that the configuration is loaded correctly in the path http://localhost:4200/assets/content-configuration.json
Step 5: Consuming Local Content Configuration
To see the Microfrontend in the OpenMFP Portal, you need to use your local content-configuration.json file. Go to the user button located in the top-right corner and navigate to Settings -> Development.
There, you will find the Local Development Mode. Activate Is Development Mode Active and enter the content configuration file path in the input field.
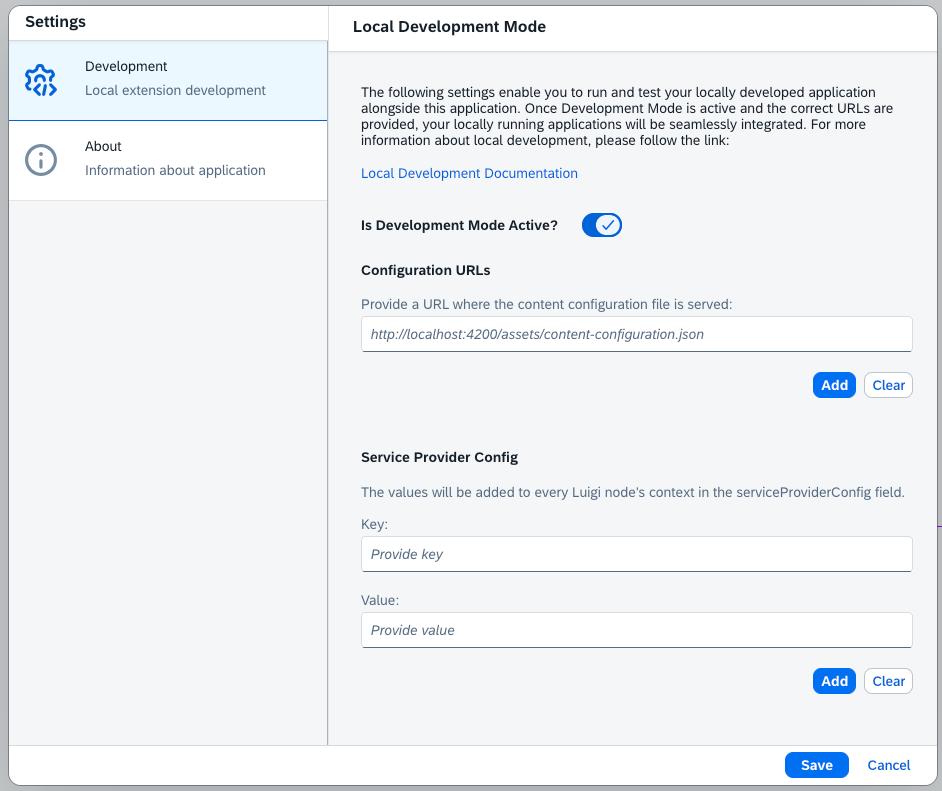
Click Add and then Save, and your Microfrontend should appear in the OpenMFP Portal.
