Web Components Microfrontends
This guide will walk you throug adding Microfrontend with Web Component approach
Overview
OpenMFP portal offers the possibility to open micro frontends as web components. For more information, please have a look at the page: Web Components. Web components can provide a fast-loading alternative for non-complex micro frontends.
Prerequisites
- Node.js active LTS or maintenance LTS version.
- npm (included with Node.js)
- Locally running Portal, if you don't have one follow Installation guide
Step 1: Prepare a folder
Create an empty directory and initialize a package so you can reuse npm scripts later:
mkdir my-webcomponent
cd my-webcomponent
Step 2: Create the web component
Inside the folder, add a file named component.js with your webcomponent:
const template = document.createElement('template')
template.innerHTML = `
<style>
:host {
display: flex;
justify-content: center;
font-family: sans-serif;
padding: 24px;
}
</style>
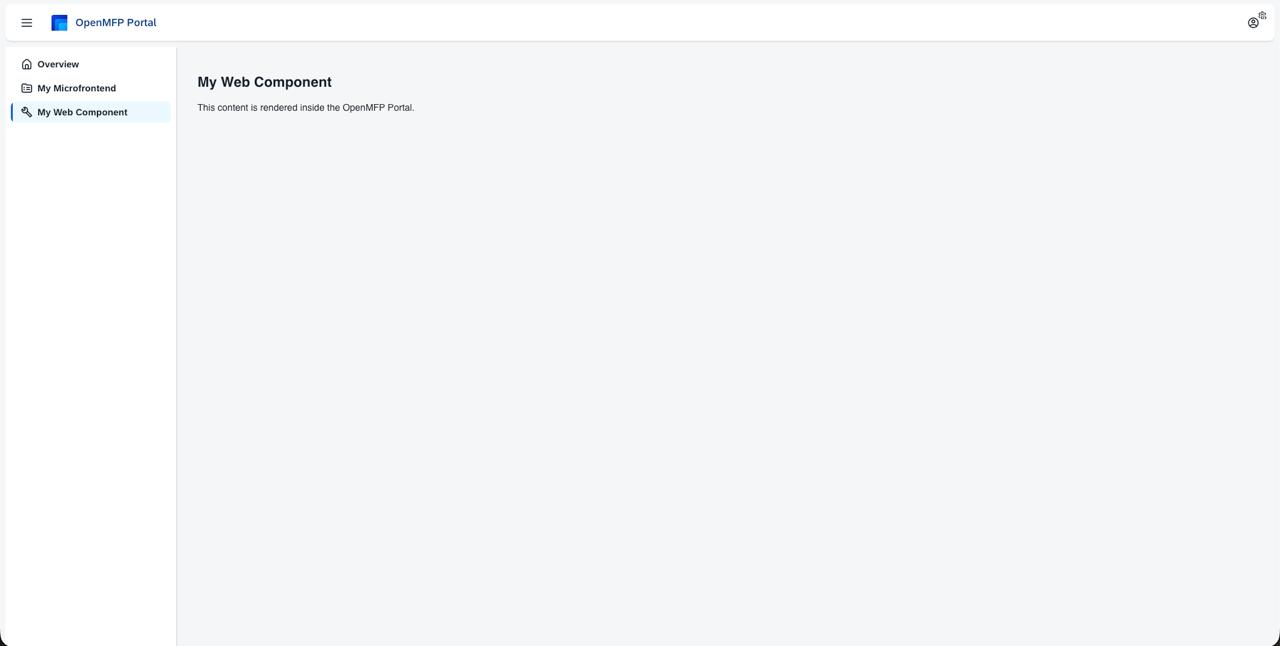
<section>
<h2>My Web Component</h2>
<p>This content is rendered inside the OpenMFP Portal.</p>
</section>
`
class MyWidget extends HTMLElement {
constructor() {
super()
const shadowRoot = this.attachShadow({ mode: 'open' })
shadowRoot.appendChild(template.content.cloneNode(true))
}
}Step 3: Add the content configuration
In the same folder, create content-configuration.json so the Portal can load the navigation node from the same origin as the JavaScript bundle:
{
  "name": "my-webcomponent",
  "luigiConfigFragment": {
    "data": {
      "nodes": [
        {
          "pathSegment": "webcomponent-demo",
          "label": "My Web Component",
          "url": "http://localhost:4400/component.js",
          "webcomponent": true,
          "loadingIndicator": {
            "enabled": false
          },
          "entityType": "example"
        }
      ]
    }
  }
}
Step 4: Serve everything from localhost
Use http-server (available through npx) to host the folder, including the JavaScript bundle and content-configuration.json, and enable CORS headers:
npx http-server . -p 4400 --corsMake sure http://localhost:4400/component.js and http://localhost:4400/content-configuration.json both open in the browser.
Step 5: Load the configuration in the Portal
Repeat step from Create Microfrontend guide
- Open the Portal UI and select the avatar menu in the top-right corner.
- Navigate to Settings → Development.
- Enable Is Development Mode Active and paste the URL to your
content-configuration.json. - Click Add, then Save. The
My Web Componententry should appear in the navigation and render the custom element when selected.