Installation
This guide walks through how to get started creating your very own OpenMFP Portal.
Summary
We will walk you through the steps to set up your very own portal. By the end of this guide, you will have a standalone Portal running locally. To be clear, this is not a production-ready installation, and it does not contain information specific to your needs.
Contributors
If you are planning to contribute a new feature or bug fix to the OpenMFP project, we advise you to follow the Contributors guide.
Prerequisites
This guide also assumes that you have some experience with the terminal, specifically, these commands: npm, npx.
- Node.js installed using one of these methods:
- Using
nvm(recommended)- Installing nvm
- Install and change Node version with nvm
- Node 24 is a good starting point, this can be installed using
nvm install 24
- Binary Download
- Package manager
- Using NodeSource packages
- Using
Create your Portal
Once the prerequisites are in place, follow these steps to set up your Portal:
To install the Portal, we will make use of npx. npx is a tool that comes preinstalled with Node.js and lets you run commands straight from npm or other registries. Before we run the command, let's discuss what it does.
This command will:
- create a new directory with a Portal inside.
- Generate all necessary configuration file
- Set up frontend and backend structures
- Display the complete project structure
- Install all dependencies automatically
npx @openmfp/create-portal@latestAlso you can provide a name to your portal by passing it as argument.
npx @openmfp/create-portal@latest my-awesome-portalThis name will be used as subdirectory in your current working directory.
INFO
If you face any issue with this tool you can visit troubleshoot section in github
2. Run the Portal
Your Portal is fully installed and ready to be run! Now that the installation is complete, you can go to the application directory and start the app using the npm start command. The npm start command will run both the frontend and backend as separate processes in the same terminal.
cd my-portal # your app name
npm start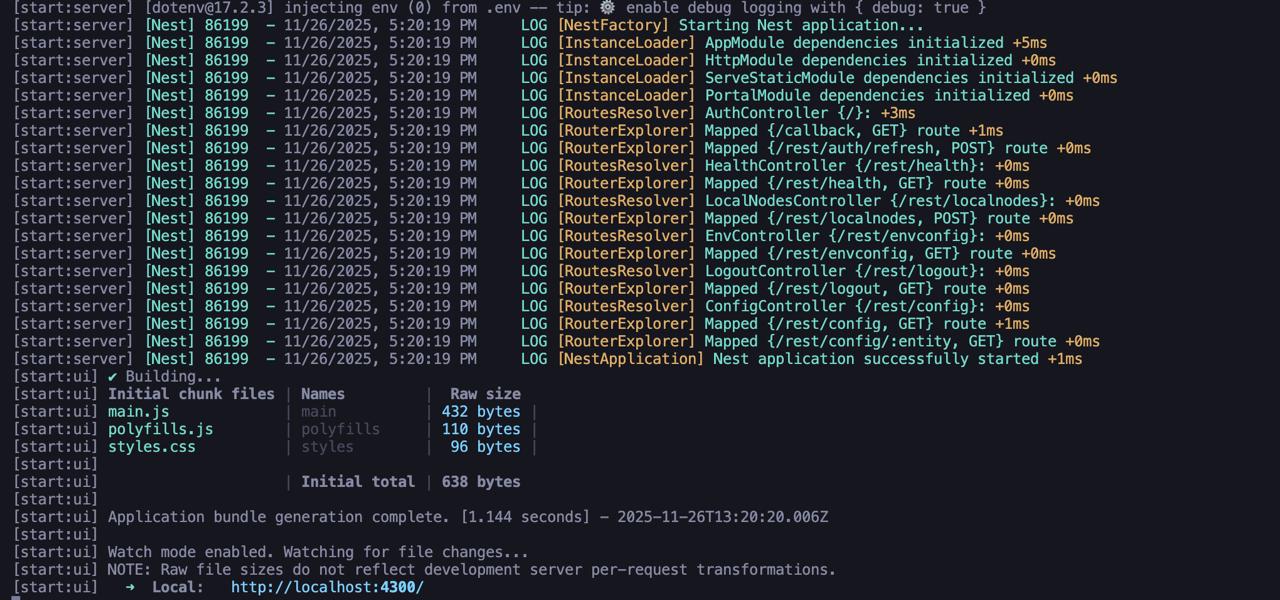
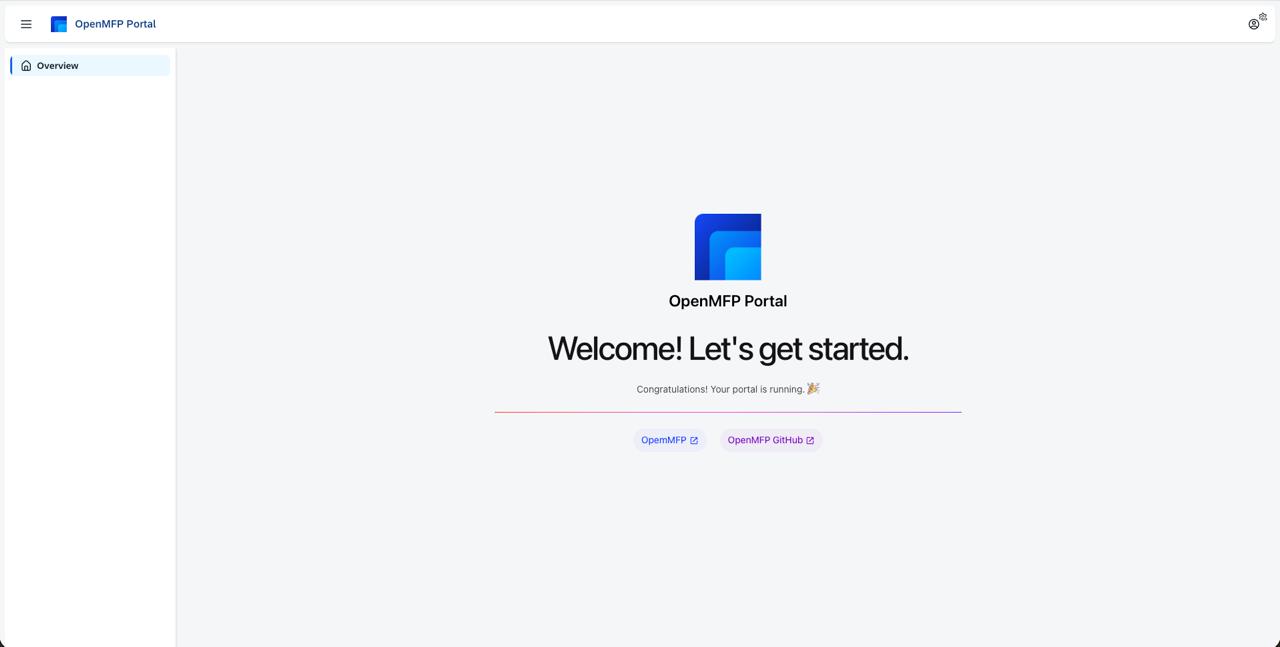
Then you can visit localhost:4300 to start exploring Portal immediately.
Recap
This tutorial walked through how to create your own Portal using the npx @openmfp/create-portal@latest command. That command created a new directory that holds your new Portal.
Create a Microfrontend
Now when you have your portal running locally, you can create a new micro frontend and connect it to your portal. Follow the steps in the Create Microfrontend Guide.